Wide-angle photography in nutrient-rich environments
Imagine yourself at a famous dive site, one you’ve wanted to visit for years. You’ve seen the spectacular images from this area — lush reefs, clear blue water, cavorting marine creatures, the works. Your wide-angle rig is prepped, you’re geared up, and you’re ready to David Doubilet the heck out of this place. But as soon as you hit the water, your heart sinks. The water is neither clear nor blue; it’s more of a murky army green. Sure, the reef is stunningly beautiful, but you surmise wide-angle photography will be incredibly frustrating with such limited visibility. A few shots, a lot of backscatter and probably several expletives later, your suspicions are confirmed. You spend the rest of your dive thinking longingly about the macro lens sitting in your camera bag.
Sound familiar? This situation has happened to most of us.
The Meaning of “Green”

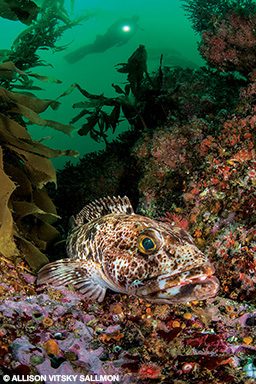
It’s critical to clarify that this article is not exclusively about photographing cold-water environments, where water tends to be green — they don’t call it the Emerald Sea for nothing. Green water — which contains high levels of plankton, algae or sediment — can appear anywhere. In some places this is the rule rather than the exception; in others it’s a seasonal phenomenon caused by conditions such as precipitation runoff or deep-water upwellings. Occasionally it’s simply the luck of the draw — and we don’t necessarily mean bad luck.
Nutrient-rich water can make for gorgeous backdrops; not only can it provide deep emerald-green coloration, but it can also help to filter sunlight, allowing the formation of striking sunrays. Many destinations are known for nutrient-rich environments — or more specifically, for the incredible and often unique marine life that thrive in such conditions. The spectacular reefs of southern Komodo and Raja Ampat, the pelagic life of the Galápagos Islands, and the rocky reefs of temperate North America, Australia and New Zealand all represent unique ecosystems nurtured by nutrient-rich water. Sure, you can be surprised by fabulous visibility in any of these places, but it’s wise to be prepared for challenging conditions. With a few adjustments, you may find that they no longer represent an enormous obstacle.
It’s Not Easy … Well, You Know
Capturing wide-angle images in nutrient-rich environments is one of the most valuable skills an underwater photographer can develop, but it’s not always easy, especially when it comes to exposure. This kind of imaging is best classified as advanced close-focus wide-angle photography. Whereas shooting large vistas in clear water can be a bit forgiving in terms of arrangement of external light sources and selection of camera settings, this is rarely the case in green water. Careful placement of external light sources is often necessary to minimize backscatter (unintended exposure of particulate in the water column), flare (hazy scattering of light from an external light source), unwanted shadows and hotspots. In addition, because green-water environments can be dark, they may also require higher ISOs (a measurement of the light sensitivity of the imaging sensor) and/or relatively low shutter speeds. We’ll cover each of these points separately, but it’s best to begin by realizing that it may take some effort to truly nail an image in these conditions; patience is critical. Your best chances of success will occur when you work slowly and deliberately, stopping often to review the images you’ve already taken and adjusting the settings as needed.
One Rule to Rule Them All

Get close. This guideline isn’t unique to shooting in green water; it applies any time an underwater photographer is using external light sources to highlight a foreground subject. Water is about 800 times denser than air, so the farther away you are from your foreground, the more light is absorbed in the water column and is therefore unavailable to illuminate your subject. In green water this principle is ultracritical, as any illuminated particles between your lens and your subject can show up as backscatter in your images. Putting it simply, less water in that space means less crud for you to inadvertently light when you take an image.
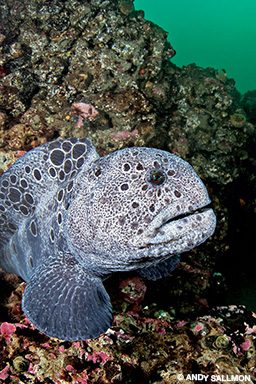
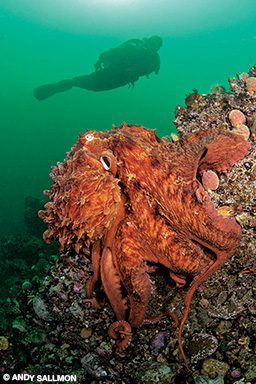
We tend to follow what we call the “10 percent rule” — a guideline that defines the maximum distance to be from a foreground subject based on visibility (for example, if the visibility is 20 feet, we try to be no farther than 2 feet away from our subject). Keeping this in mind, limited visibility may subsequently limit your optimal subject size. That 6-foot-wide sea fan might be calling your name, but a subject that large requires a bit of working distance even when using a super-wide lens if you wish to light it properly; you will greatly improve your chances of minimizing backscatter if you fill the frame with (i.e., get very close to) a smaller subject.
Getting close may also dictate the best image format. With a subject that is naturally more vertical, for instance, it will be easier to fill the frame — therefore decreasing the space in which backscatter can occur — if you opt to capture a vertical image. Finally, remember that the ability to get close to subjects (especially small ones) can be significantly aided by certain types of gear, such as short focal length wide-angle zoom lenses, compact housings, small-diameter minidome ports, shorter strobe arms and smaller strobes (typically with diffusers).
Be Precise With External Light
For the sake of simplicity, we’ll refer to external lights as “strobes,” but these guidelines apply equally to other light sources such as LED lights.

Shooting in green water will challenge your external lighting skills; it is an unforgiving environment when it comes to even the slightest mistakes. You won’t be able to arrange your strobes at the start of your dive and forget about them; you’ll need to constantly pay careful attention to both positioning and aiming. Strobe positioning (the placement of your strobes relative to both your camera and your subject) ensures a proper starting point for your lighting. Since you’ll often want to get close to your subject in green (especially murky green) water, this distance will help determine where to position your strobes. Space strobes the same distance apart from each other as the distance from the camera to the subject; if using only one strobe, it should be the same distance from the camera as the camera is from the subject. Remember that if you’re getting close to a small subject, your strobes may indeed be very close to your housing. It’s often desirable to position your strobes higher than your subject, which will deliver a more natural feel to your image, as lighting from this vantage mimics the position of the sun.
Strobe aiming (directing the fronts of your strobes) will help define contrast and create shadow. In general, remember that brightness should be on the subject, with either shadow or available light on the less important portions of the background. A good starting point for strobe aiming, especially when you’re working very close to your subject, is to point your strobes either forward or at a 45-degree angle toward your subject. This trick can help you avoid unintended shadows in the center of your image. Aiming strobes in this way is somewhat similar to how you would aim them for a macro subject but with one key difference: When aiming like this for wide angle, your strobes must be pulled back with their fronts no further forward than the middle of your housing/handles. If your strobes are too far forward, especially if you’re working with a fisheye lens, the flash can be visible as flare at the edges of your image. In turbid water (more than in crystalline water), the “cone” of light is visible and can sneak into the frame.
Shooting in the Dark

Some green-water situations, such as temperate water, overhead environments or extreme depths, can add another level of challenge to photography: limited ambient light penetration. In these situations you may need to increase your ISO and/or decrease your shutter speed to gain reasonable background exposure. Each approach has its drawbacks, so it’s important to be judicious when deciding how to proceed.
Increasing ISO a bit is often our first-level approach with the hope that this will allow us to maintain a high enough shutter speed to deal with water movement as well as to freeze the action of any dynamic marine life we might encounter. Most mid- to pro-level cameras released in the past few years handle higher ISOs well, but going too high will cause images to be noisy, no matter what kind of camera you’re using. Remember that if you increase your ISO, you’ll need to reduce the power of your strobes or external lights accordingly.
Decreasing shutter speed, on the other hand, is simpler, allows you to keep your ISO low and can be a great option for reefscapes, but you can quickly lose a day’s images to unintended motion blur if you’re not careful. That said, a slow shutter speed can create an interesting creative effect, which we’ll discuss below.
Special Techniques

Sometimes there is so much particulate in the water that using any external light source becomes an enormous challenge. Wide-angle photography is often still possible under the worst conditions, but it may be more productive (and certainly more fun) if you try a few special techniques. Using snoots (tubes that fit over your strobes to direct the light by reducing the beam angle) will allow you to selectively illuminate a chosen foreground subject while avoiding lighting the surrounding reef — or the particulate in the surrounding water. You’ll want a fairly wide tube for most wide-angle subjects. We like using recycled arm sections from an old 7 mm neoprene wetsuit, which can be folded back over the ends of your strobes when not in use.
Backlighting and other forms of off-camera lighting can also allow you to expose subjects while diminishing backscatter, as the light will not be illuminating any particulate between the photographer and the subject. Creative motion blur, achieved by using a slow shutter speed (sometimes while the photographer concurrently pans or spins the camera housing), is tailor-made for green water, as it allows the photographer to make up for low-light conditions due to the lower than normal shutter speeds used to create motion trails behind the subject. (This is also a great way to camouflage backscatter.)
Most often it is the open water that reveals the backscatter. Sometimes simply changing the composition so it reveals less water and a more busy background can camouflage the particles to the point of invisibility. If all else fails, turning off your strobes and working only with ambient light can help you avoid backscatter in your images.
Conclusion
Shooting in nutrient-rich water is a labor of love, but with a little bit of effort it can deliver big rewards. Taking the time to hone these photo techniques can provide not only images of an incredible array of unique marine life but also the confidence of knowing that you can capture a few keepers even in challenging conditions.
© Alert Diver — Q2 2019